First Tech Tuesday Post On Making A Cat6 Cable
My home lab reminded me why I still love "old school" networking skills.
Last week my internet started feeling... mushy. Video calls stuttered, pages hung, but nothing obvious was on fire.
So I treated it like a mini incident:
- Checked the modem and router
- Swapped ports
- Watched the link light flicker in a way I didn’t like
Turned out one of my CAT6 cables had gone bad.
Years ago, I invested in a 500 ft spindle of bulk CAT6 and a simple crimping kit. It’s paid for itself many times over in moments like this.
So I cut a fresh length and made a new cable:
- Measure and cut the cable to length.
- Strip ~1 inch of the outer jacket (without nicking the pairs).
- Untwist and straighten the pairs.
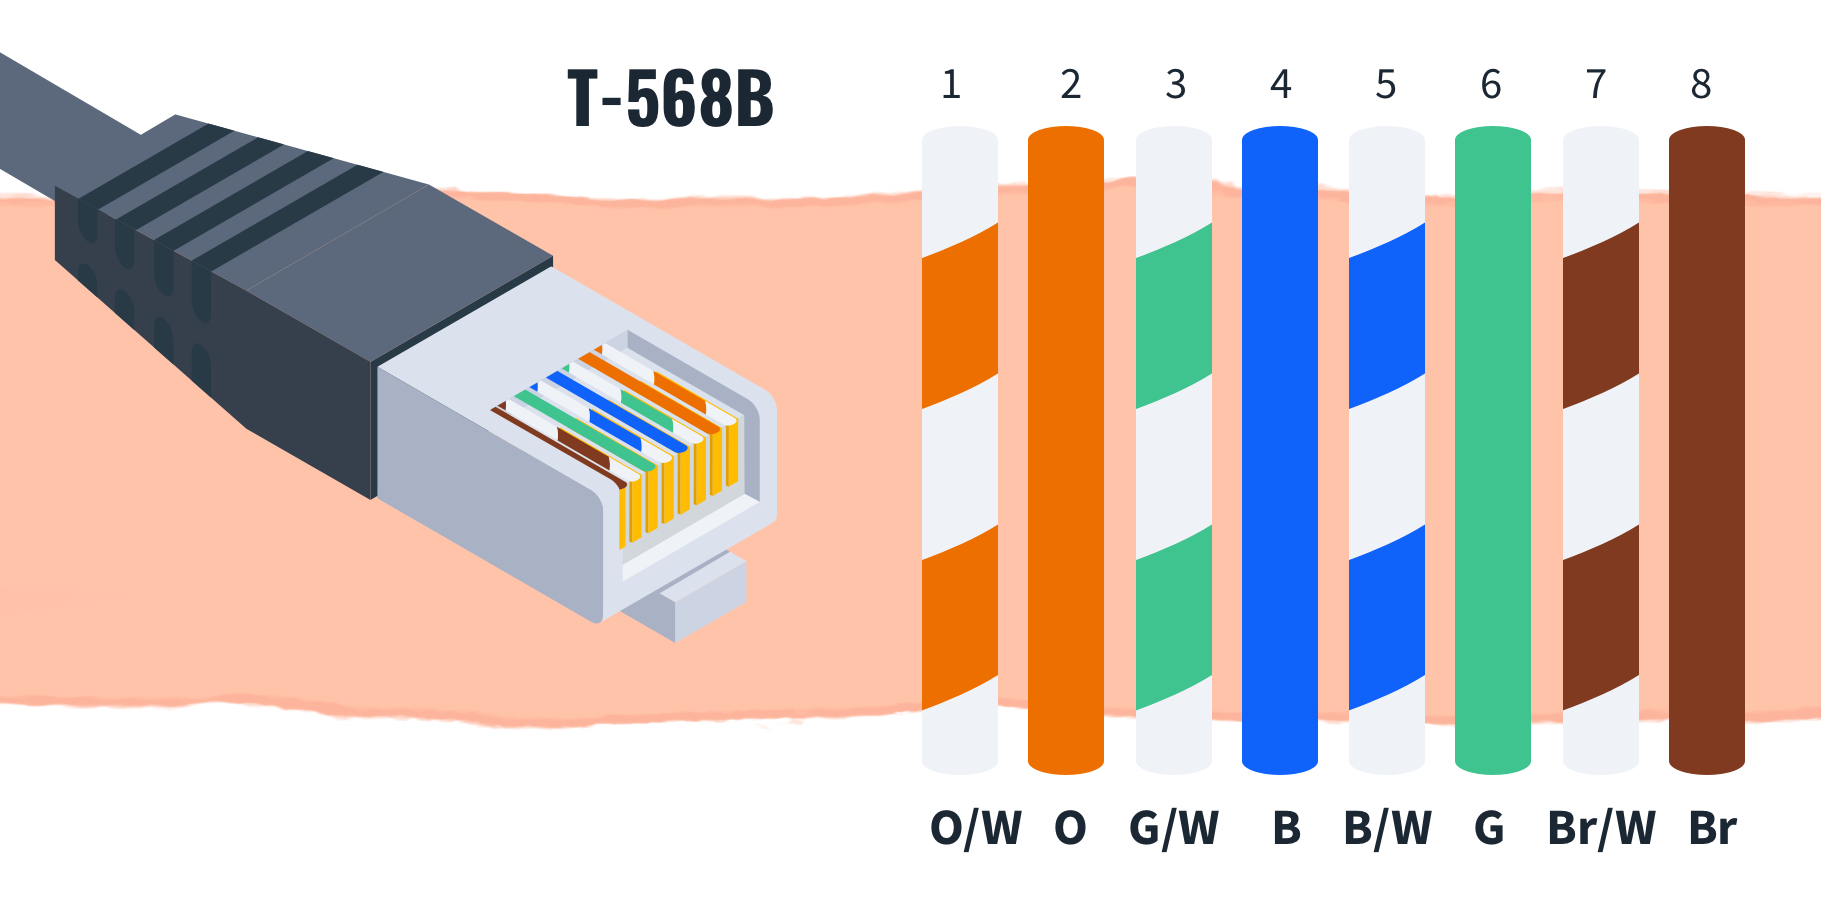
- Arrange the wires in order (I use T568B):
- White/Orange, Orange, White/Green, Blue, White/Blue, Green, White/Brown, Brown
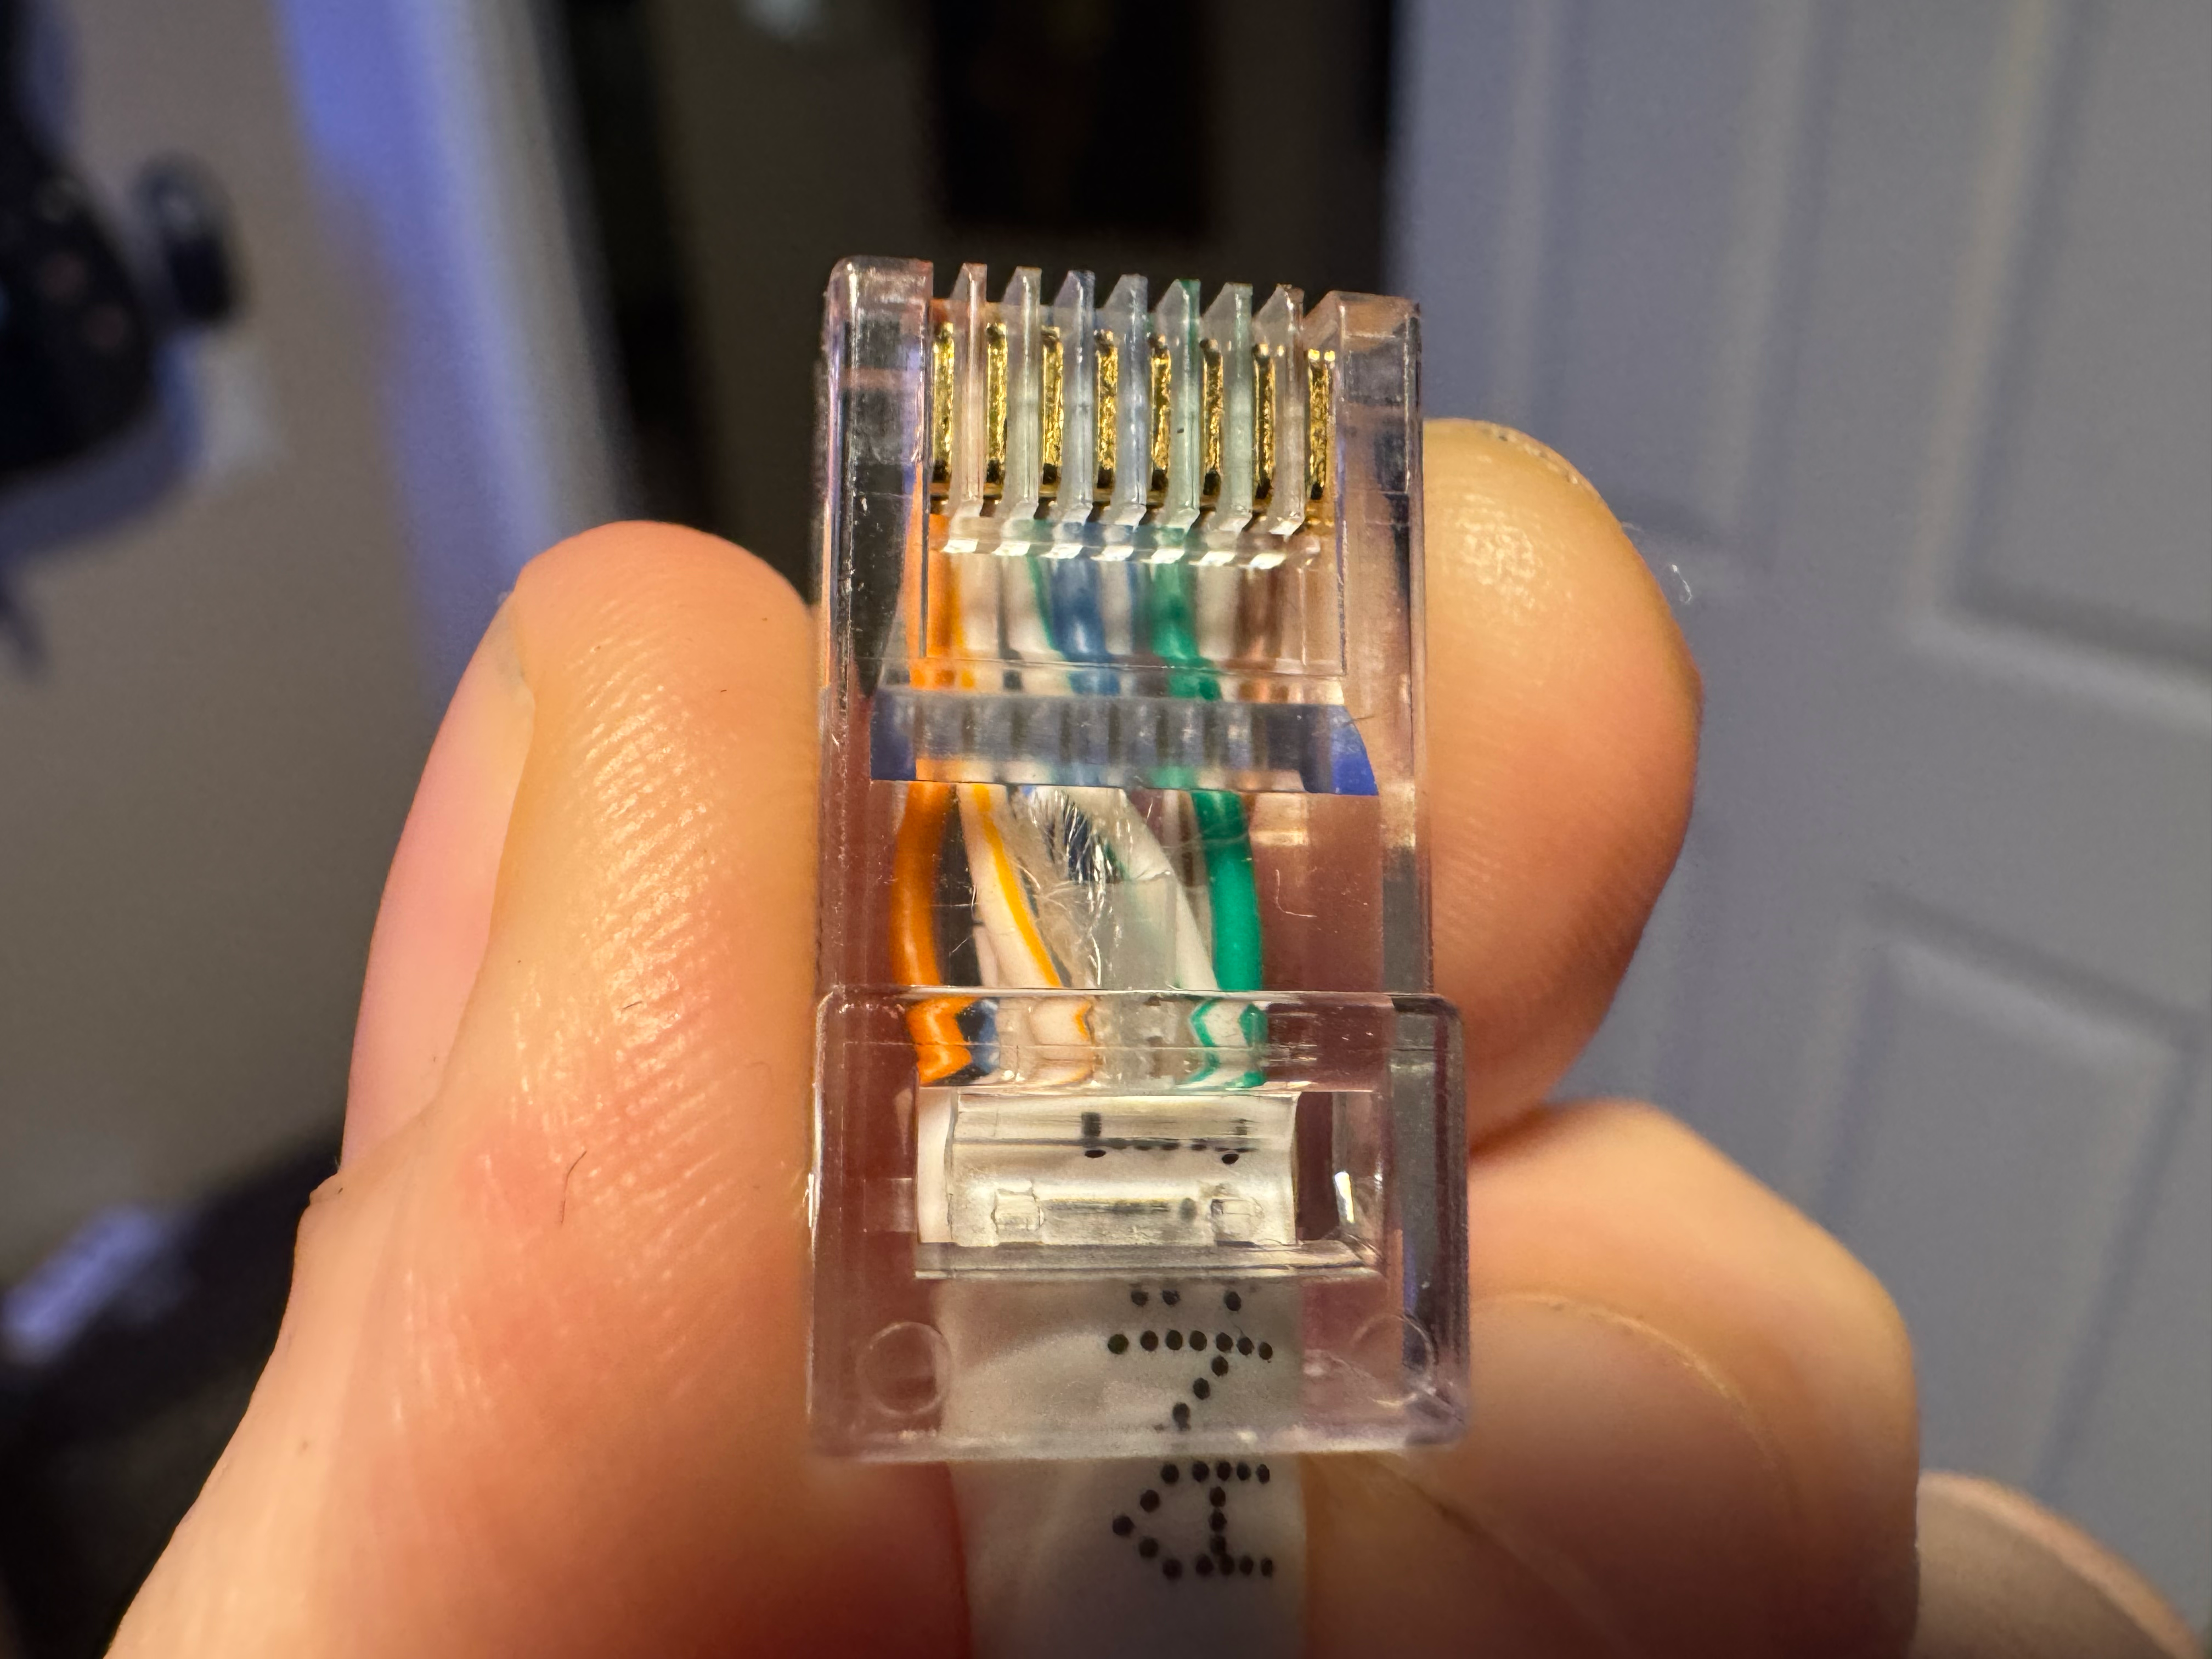
- See attached images for diagram and completed cable.
- Trim the ends flat so they’re even.
- Slide into the RJ45 connector (check each wire goes fully to the front).
- Crimp firmly, then test the cable.
Problem solved and latency back to normal.
Fun fact: CAT7 was ratified back in 2002 and designed to support 10GBASE-T up to 100m, but the official IEEE standard for 10GBASE-T on copper didn’t land until 2006. That mismatch meant there wasn’t much mainstream demand for CAT7/CAT7A outside some niche European use cases. CAT5e and CAT6 ended up owning the market instead.
Thinking of making this a weekly thing as #TechTuesday, where I share practical, hands-on bits from the technology world with a DevOps / SRE / homelab spin.
What’s one old school hardware skill you picked up that still bails you out today?
#TechTuesday #Networking #HomeLab #SRE #DevOps #LearnWithOJ #Networking